You can easily setup UTM conversion tracking for WooCommerce by using our AFL UTM Tracker plugin.
This document outline the steps for you to verify that your next WooCommerce Order comes attached with our Conversion Attribution Report.
Minimum Required Plugins
- AFL UTM Tracker v2.9.0
- WooCommerce v3.6.0
Plugin Installation
- Install our AFL UTM Tracker plugin into your WordPress site.
- Clear all your page cache.
- Conversion tracking is now enabled.
Checkout & place a test order on your WooCommerce store
- Use the Google’s Campaign URL Builder to generate a campaign URL.
- With the generated campaign url, open that link in your Private Browser mode as to simulate a new visitor.
- Add a product to your cart and go through the checkout process.
View the Conversion Attribution Summary
- Login to your WordPress Admin page using your Normal Browser mode.
- Go to your WooCommerce > Orders page.
- Here you will get a quick view of each order’s conversion attribution.

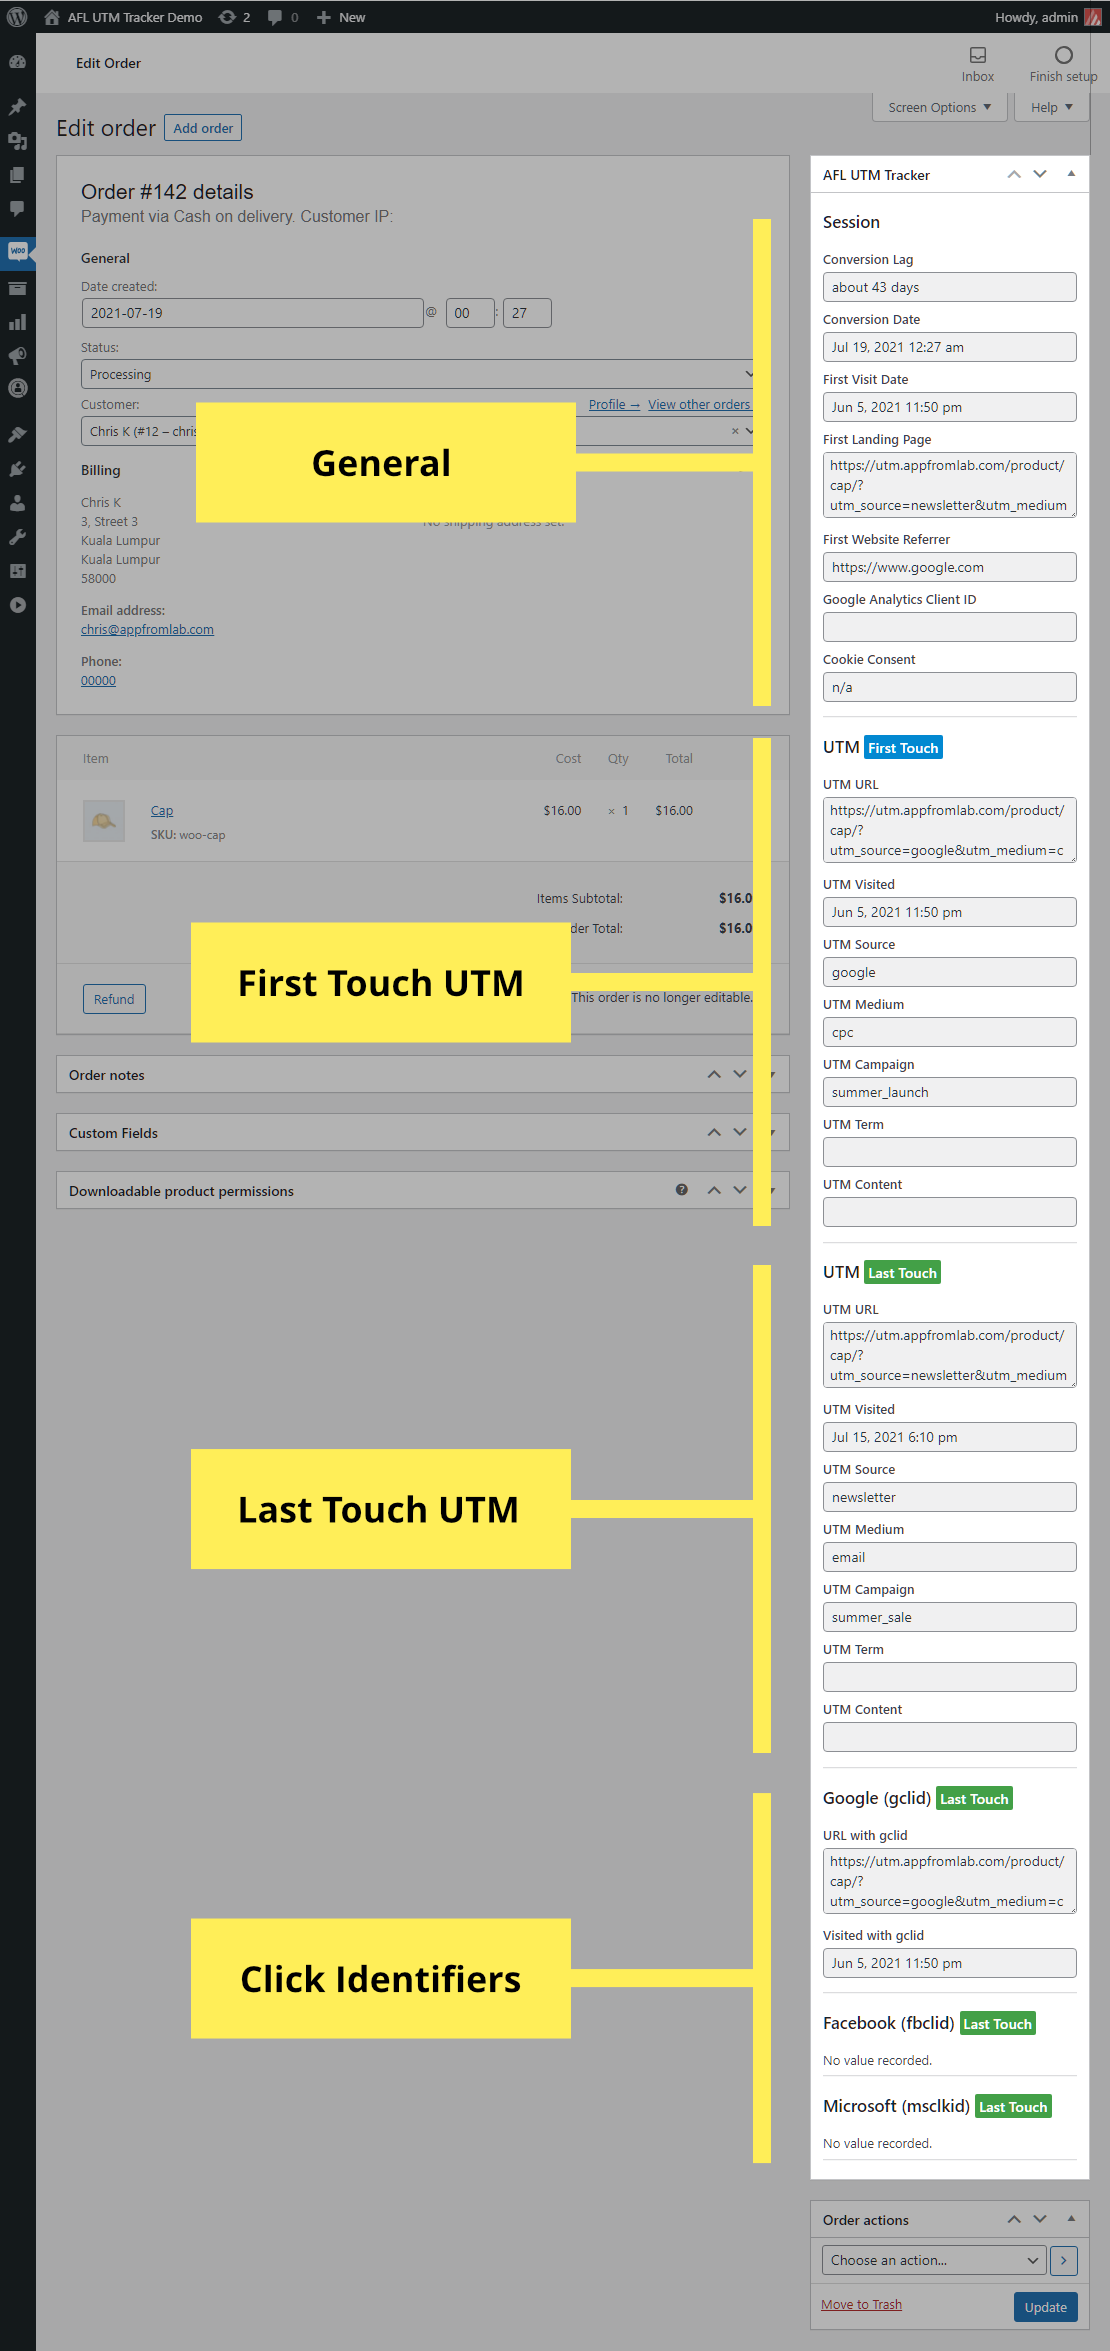
View the Conversion Attribution Report
- To view the more detailed report, click into the individual Order.
- You will see the full report under our AFL UTM Tracker metabox.