Capture the dynamic UTM parameters of your Contact Form 7 (CF7) submissions by using our AFL UTM Tracker plugin.
This documentation outlines the steps for you to verify that your next form submission comes attached with our Conversion Attribution Report.
Minimum Required Plugins
- AFL UTM Tracker v2.9.0
- Contact Form 7 v5.7.1
Steps
Before you continue below, please make sure you have read our Getting Started article which explains the plugin installation steps. Ensure that you have cleared all page cache after installation.
- Setup the Contact Form 7 Integration (optional).
- Edit Settings for Individual Forms (optional).
- Add Conversion Attribution Report into the E-mail Notification
- Test form submission.
- That’s all!
1. Setup the Contact Form 7 Integration (optional)
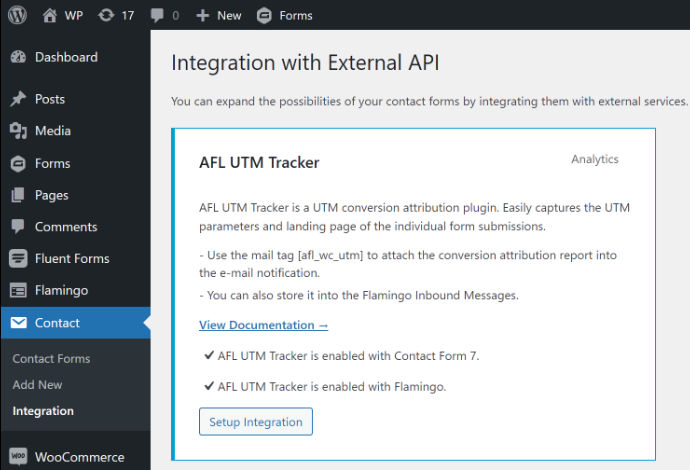
- Login to your WordPress admin.
- Go to Contact > Integration.
- Under the AFL UTM Tracker section, click on the Setup Integration button.
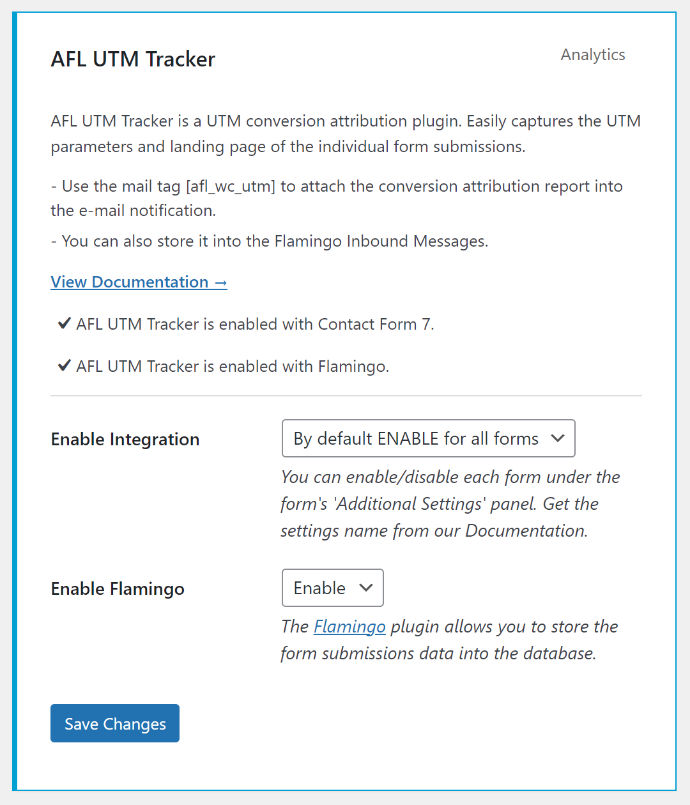
The default global setting is set to be enabled for all of your forms. You have the option to change the global setting here and later enable/disable a particular in the form’s Additional Settings.
- By default, ENABLE for all forms.
- By default, DISABLE for all forms.
- FORCE DISABLE for all forms.
2. Edit Settings for Individual Forms (optional)
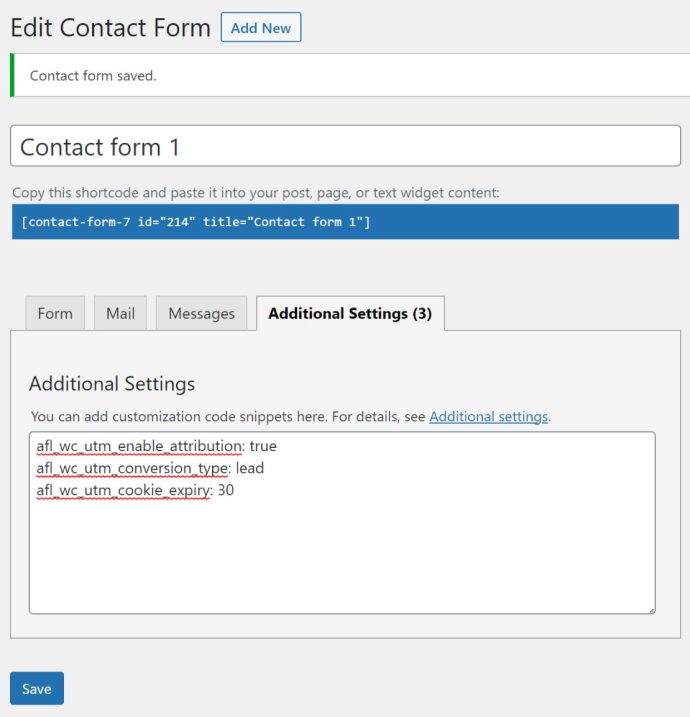
- Go to Contacts > Contact Forms.
- Click Edit on a form.
- Click on the Additional Settings tab.
This is the default setting even when you have not added these settings into the textarea.
afl_wc_utm_enable_attribution: true
afl_wc_utm_conversion_type: lead
afl_wc_utm_cookie_expiry: 30
Attribution
Depending on your global setting, you can enable or disable attribution for a form by setting the value to ‘true’ or ‘false’ like below:
afl_wc_utm_enable_attribution: trueafl_wc_utm_enable_attribution: falseConversion Type
If a particular form is for purchases, set the value to ‘order’ like below. This setting only accepts two options (lead or order).
afl_wc_utm_conversion_type: orderafl_wc_utm_conversion_type: leadCookie Expiry
Once the form is submitted, you can reduce the visitor’s cookie expiry so that a new session is created. If you would like the cookie to expire in 7 days of user inactivity, set the value to ‘7’ like below:
afl_wc_utm_cookie_expiry: 73. Add Conversion Attribution Report into the E-mail Notification
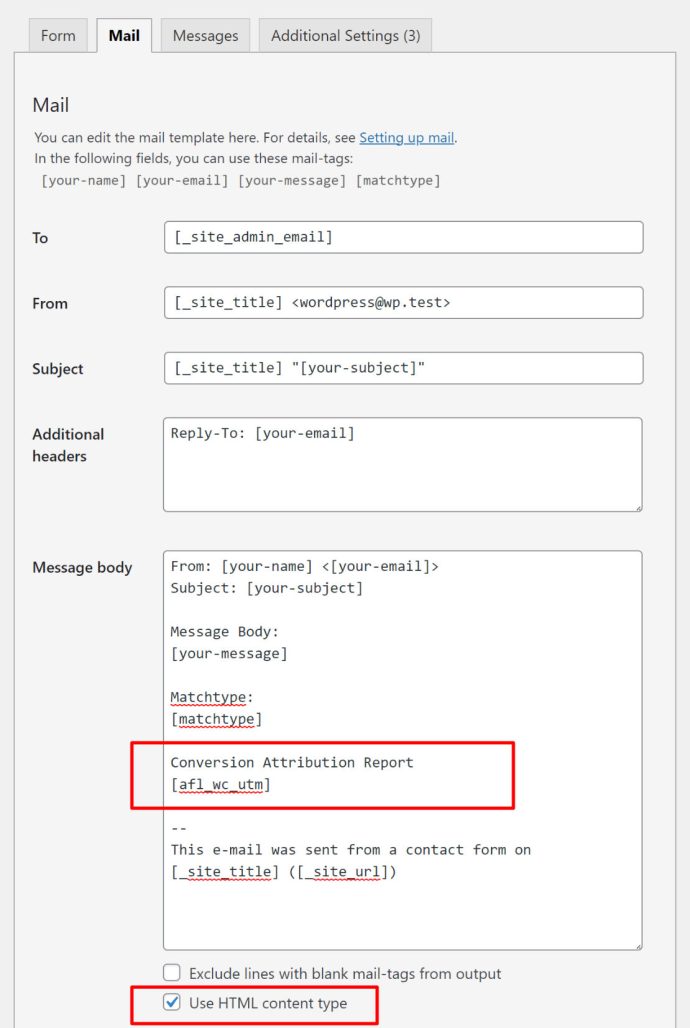
You can embed the Conversion Attribution Report into your e-mail notification by adding the shortcode like below:
- Go to Contacts > Contact Forms.
- Edit the form which you would like to embed the report.
- Click on the Mail tab.
- In the Message Body textarea, add the [afl_wc_utm] shortcode text.
- Check the “Use HTML content type”.
- Save.
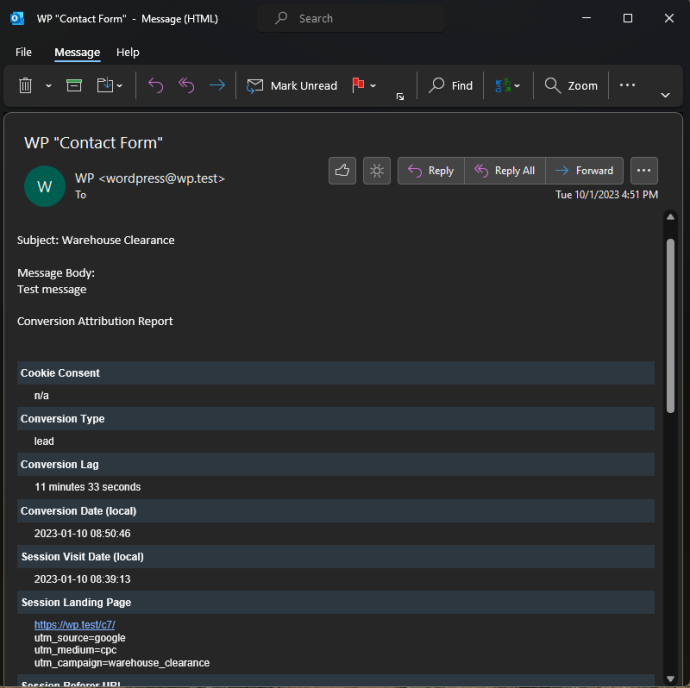
Conversion Attribution Report
[afl_wc_utm]
4. Test Form Submission
Now it is time to test your form submission.
- Go to the Google’s Campaign URL Builder.
- Generate a UTM URL and copy the URL.
- To simulate a new visitor, launch your browser in Private Browsing Mode (Incognito).
- Paste the UTM URL into the address bar.
- Browse to your form’s page.
- Submit form.
- Wait for your e-mail notification to arrive.
- Verify that our Conversion Attribution Report is populated in the e-mail body.