You can send the captured UTM parameters of your WooCommerce Orders to any webhook URL using our AFL UTM Tracker plugin and the WooCommerce Webhook feature.
In this example, we will be sending the data to Zapier’s webhook.
Requirement
- Zapier Pro plan
Steps
- Setup Zapier Webhook Trigger
- Setup WooCommerce Webhook
- Setup Code by Zapier
- Mapping UTM parameters in Google Sheet
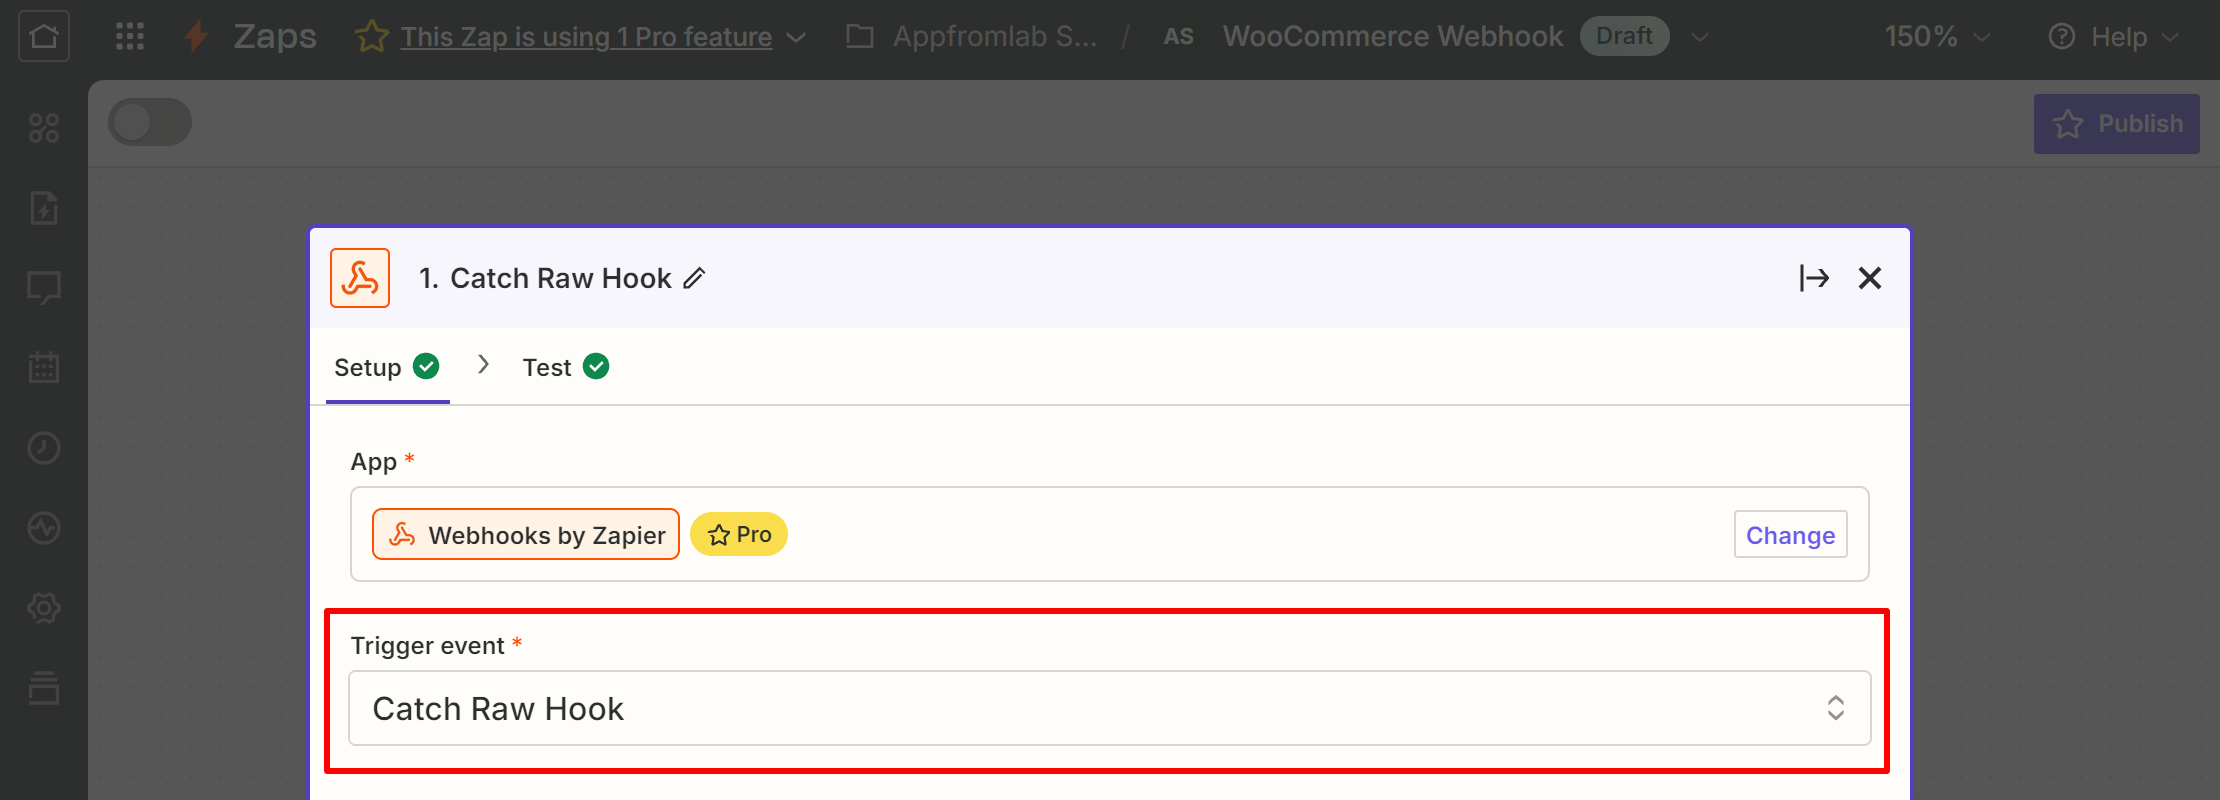
Setup Webhooks by Zapier
- Sign-in into your Zapier account.
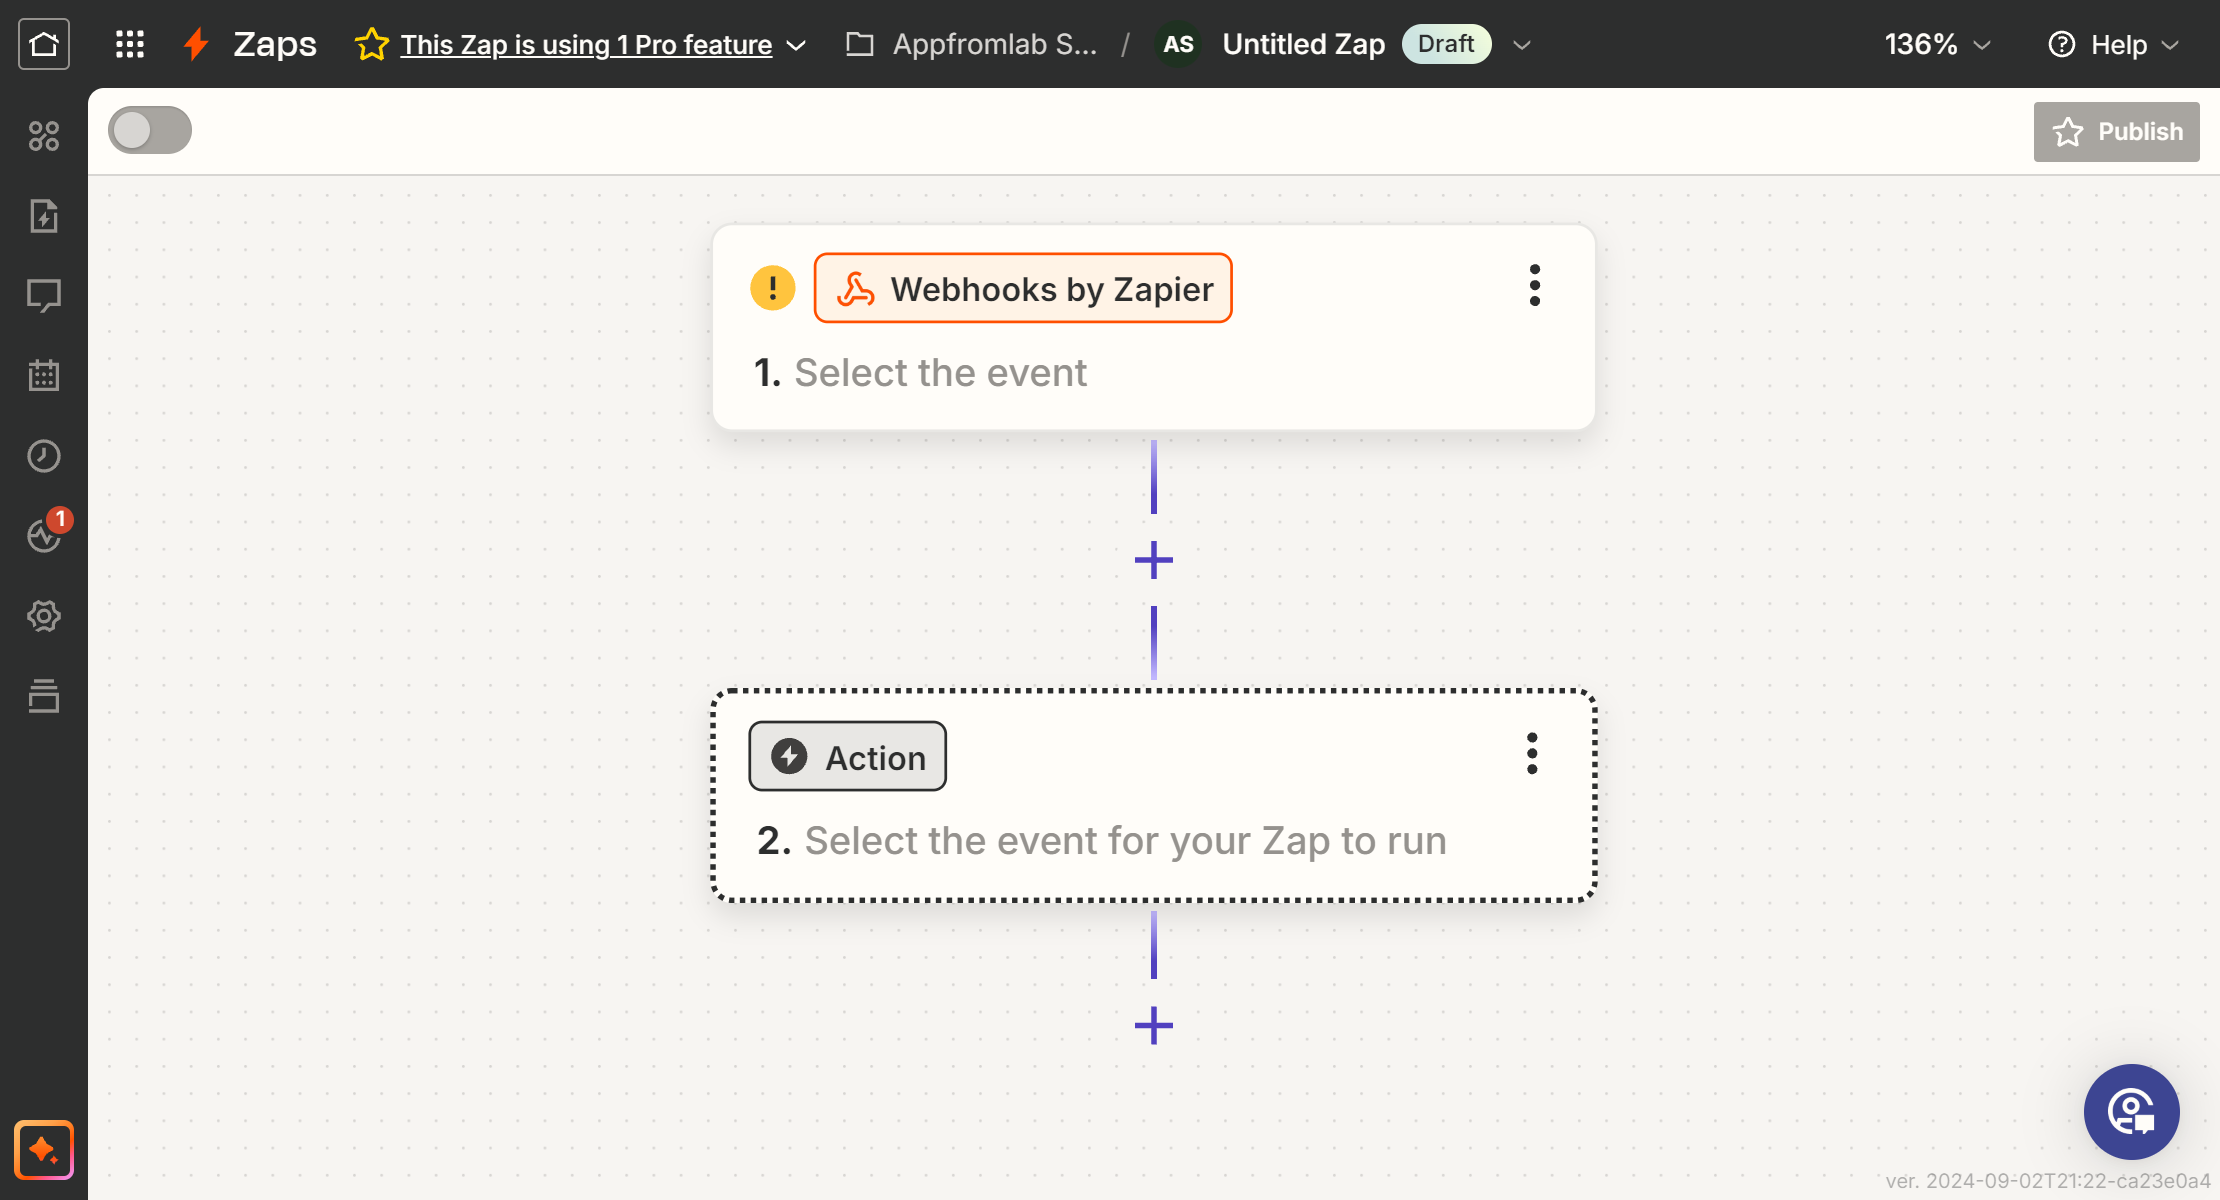
- Create a Zap.
- Click on the Trigger box.
- Find for the ‘Webhooks by Zapier’ app.
- Set the Trigger Event to ‘Catch Raw Hook’.
- Continue.
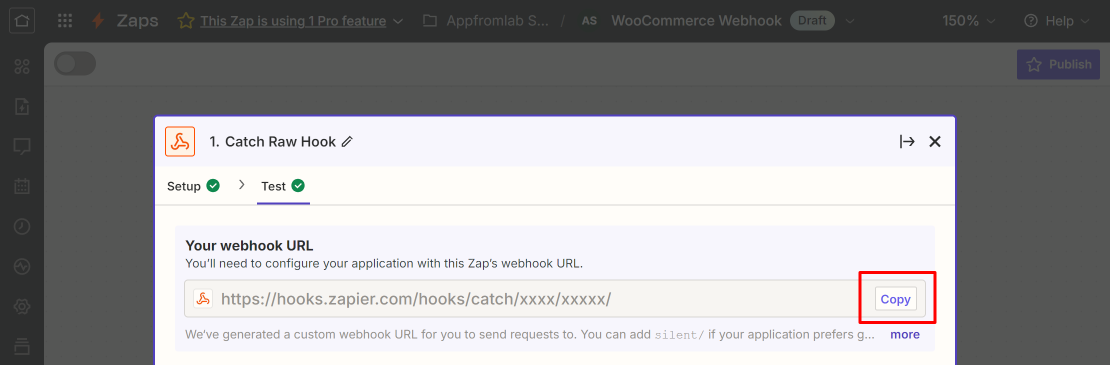
- Copy the Webhook URL.
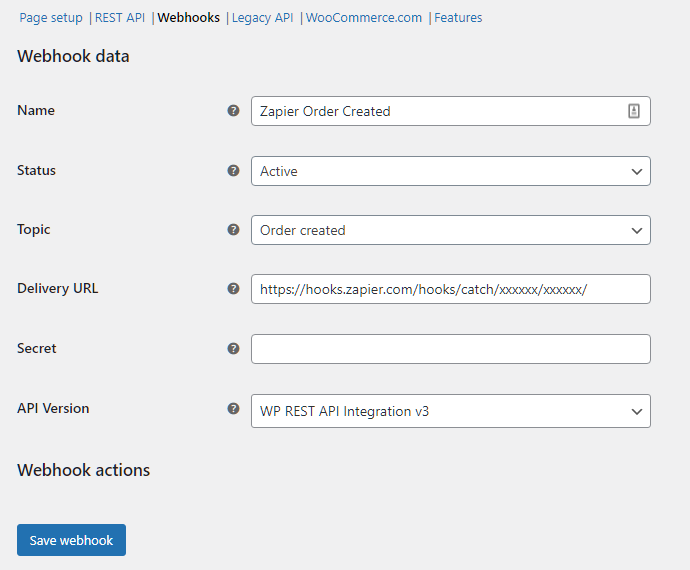
Setup WooCommerce Webhook
- Login to your WordPress admin dashboard.
- Go to your WooCommerce > Settings.
- Click the Advanced tab.
- Click the Webhooks sub-tab.
- Add webhook.
- Type in a Name (e.g. Zapier Order Created).
- Set the Status to Active.
- Set the Topic to Order Created.
- Paste the Zapier’s Webhook URL into the Delivery URL field.
- Save webhook.
- Now place an Order through your checkout page.
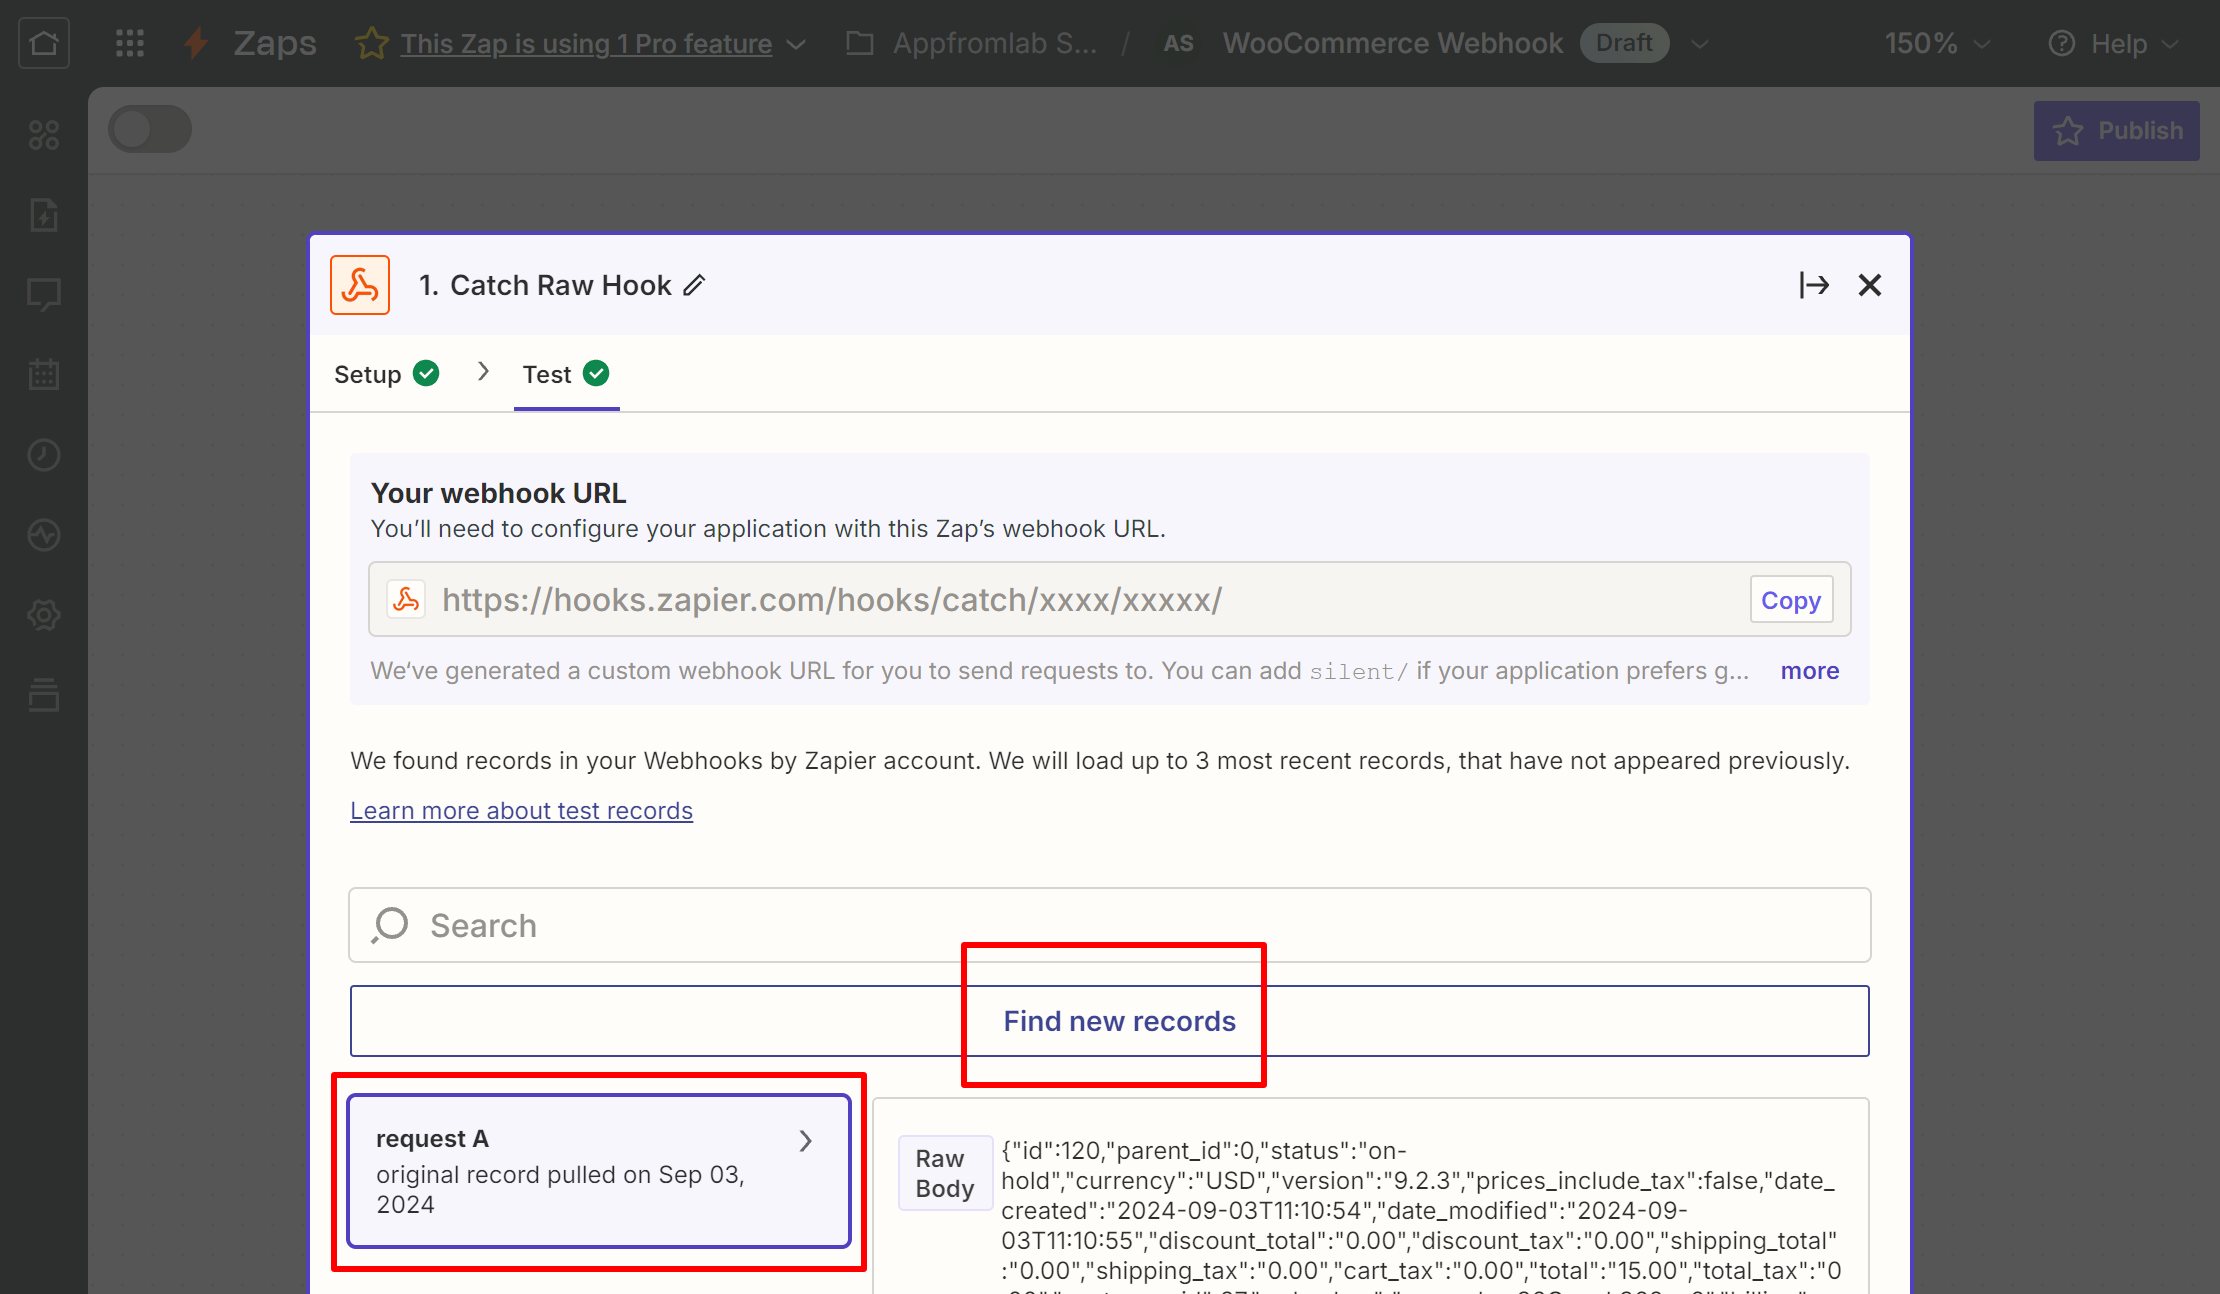
Test Webhook
- Go back to Zapier’s website.
- View the Catch Raw Hook > Test tab.
- Find new records.
- Select the latest record.
- Continue.
You might need to keep retrying until WooCommerce sends out the data.
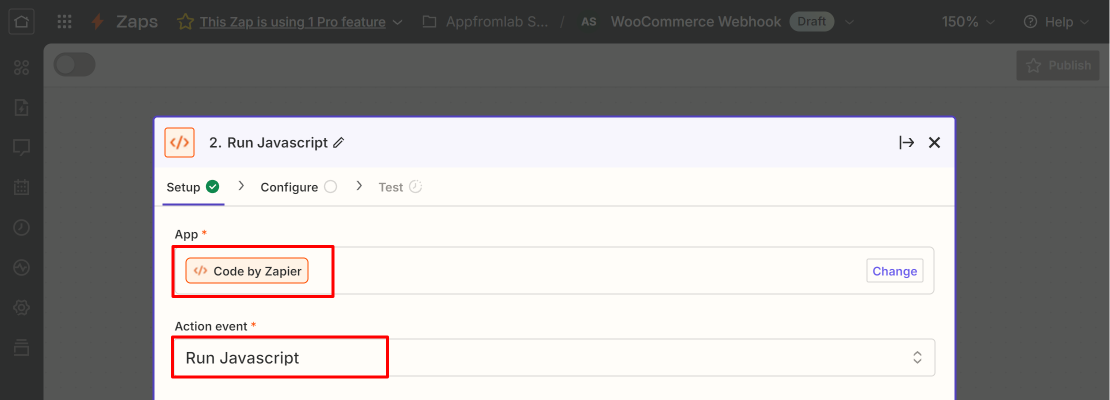
New Step: Code by Zapier
- Add a New Step.
- Search for Code by Zapier.
- Set the Action Event to Run Javascript
- Continue.
- Set the Input Data.
- body
- Click on the + button and select “1. Raw Body“.
- In the Code textbox, delete existing code.
- Copy and paste our JavaScript code below into the Code textbox.
- Click on Continue.
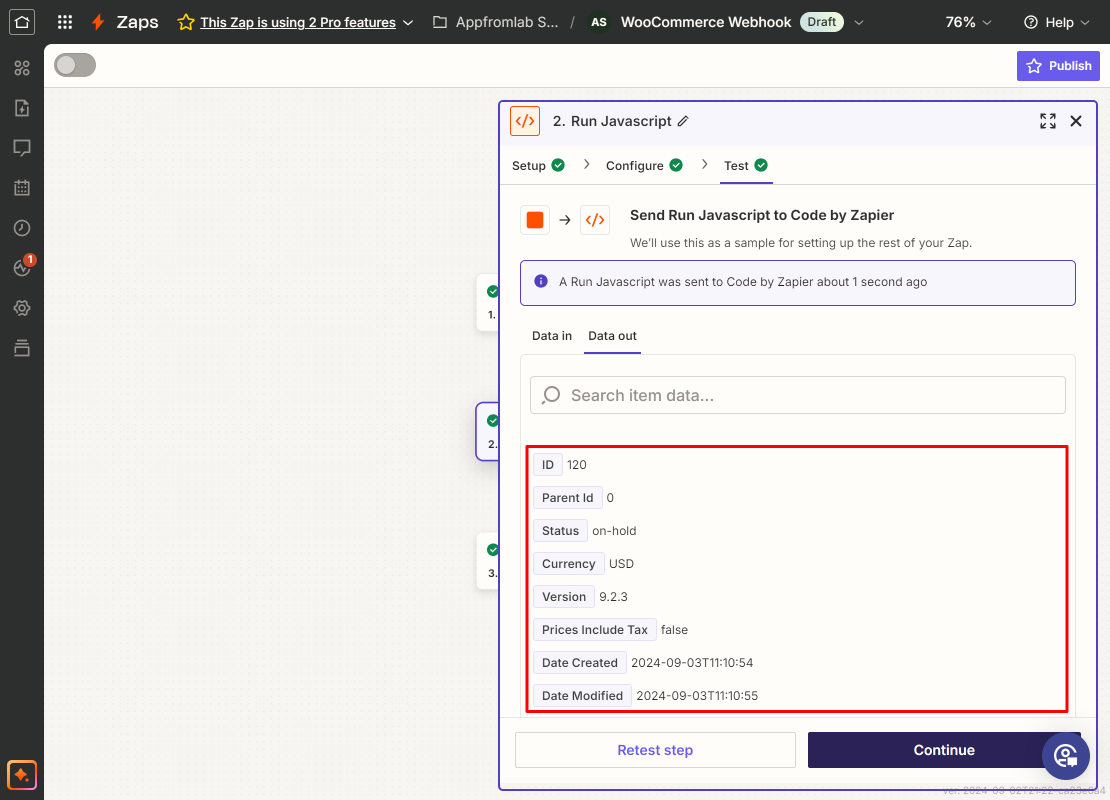
- Test step.
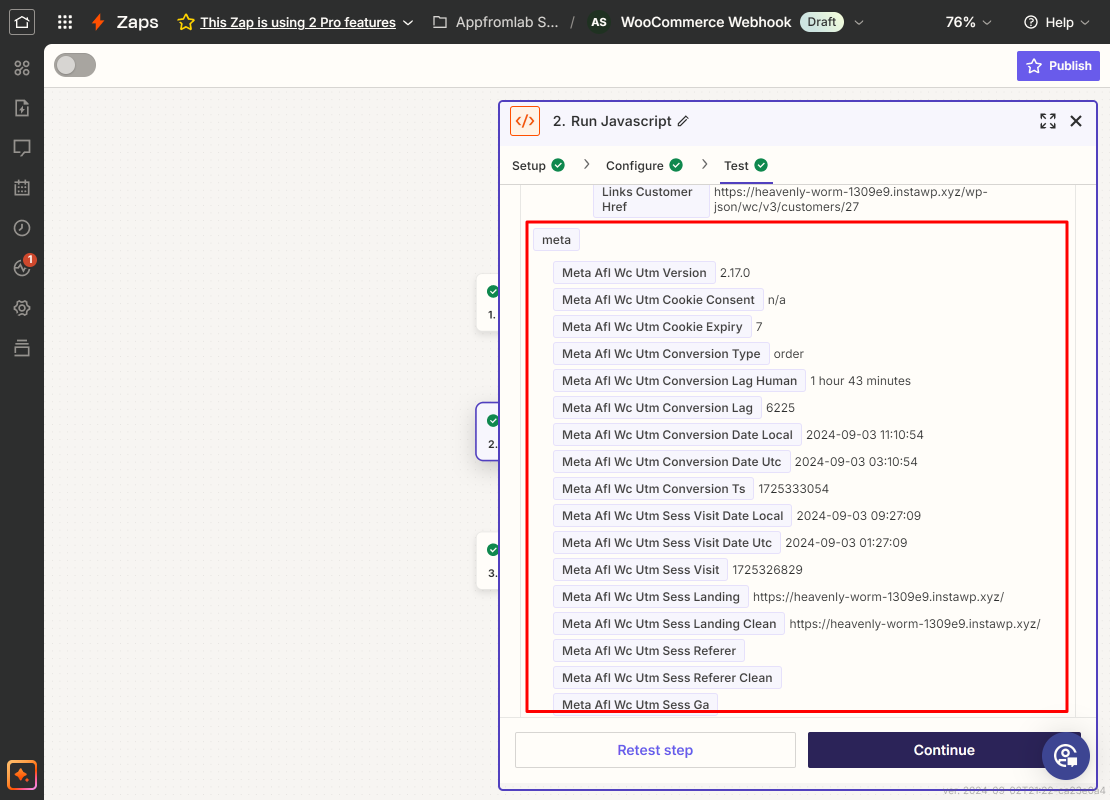
- You will see the result like in the screenshot below.
- Close the dialog by clicking on the X button at the top.
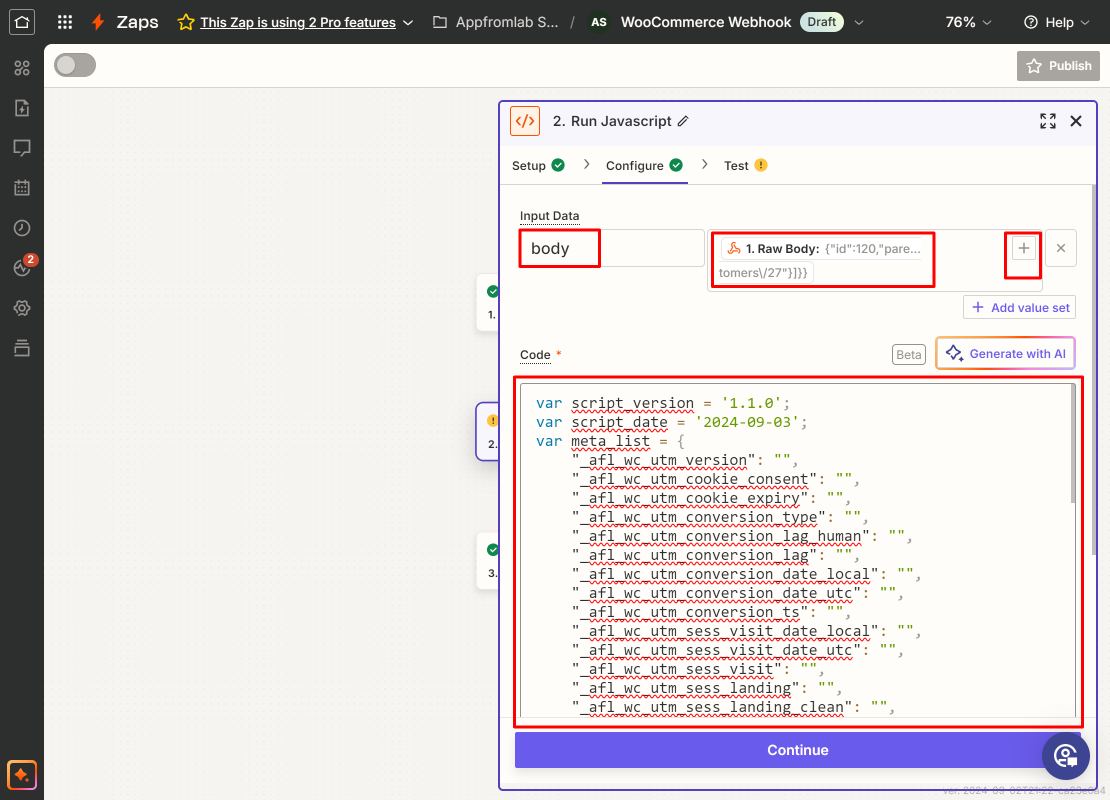
Copy the Javascript Code
This code was last updated on 2024-09-03 and given a version number 1.2.0.
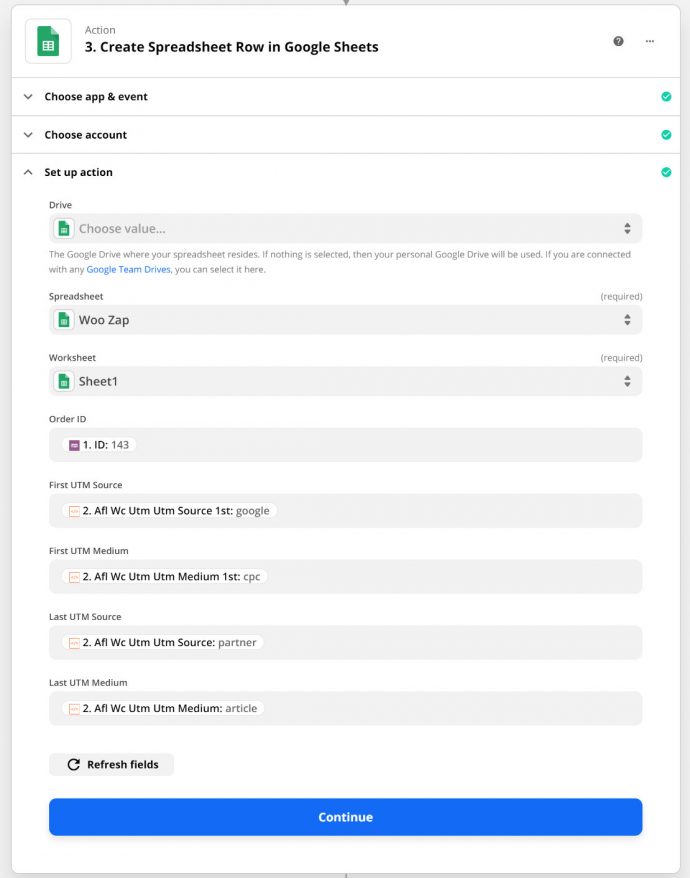
Mapping UTM parameters in Google Sheets
For this tutorial, we will show you how to map the data obtained from the JavaScript action to your Google Sheet.
- Create a Google Sheet in your Google Drive.
- Add 4 columns:
- Order ID
- First UTM Source
- First UTM Medium
- Last UTM Source
- Last UTM Medium
- In Zapier, add a new Action to ‘Create Spreadsheet Row in Google Sheets’.
- Select the Google Sheet from your Google Drive.
- Select your Worksheet.
- Refresh your fields if you don’t see any columns.
- To map the First UTM Source field, select the dropdown > Run Javascript > Afl Wc Utm Utm Source 1st.
- Continue mapping for the other fields.
- Click on Continue.
- Turn on Zap.
What does each meta value represents?
Please refer to our Attribution Meta List to know what each meta represents.