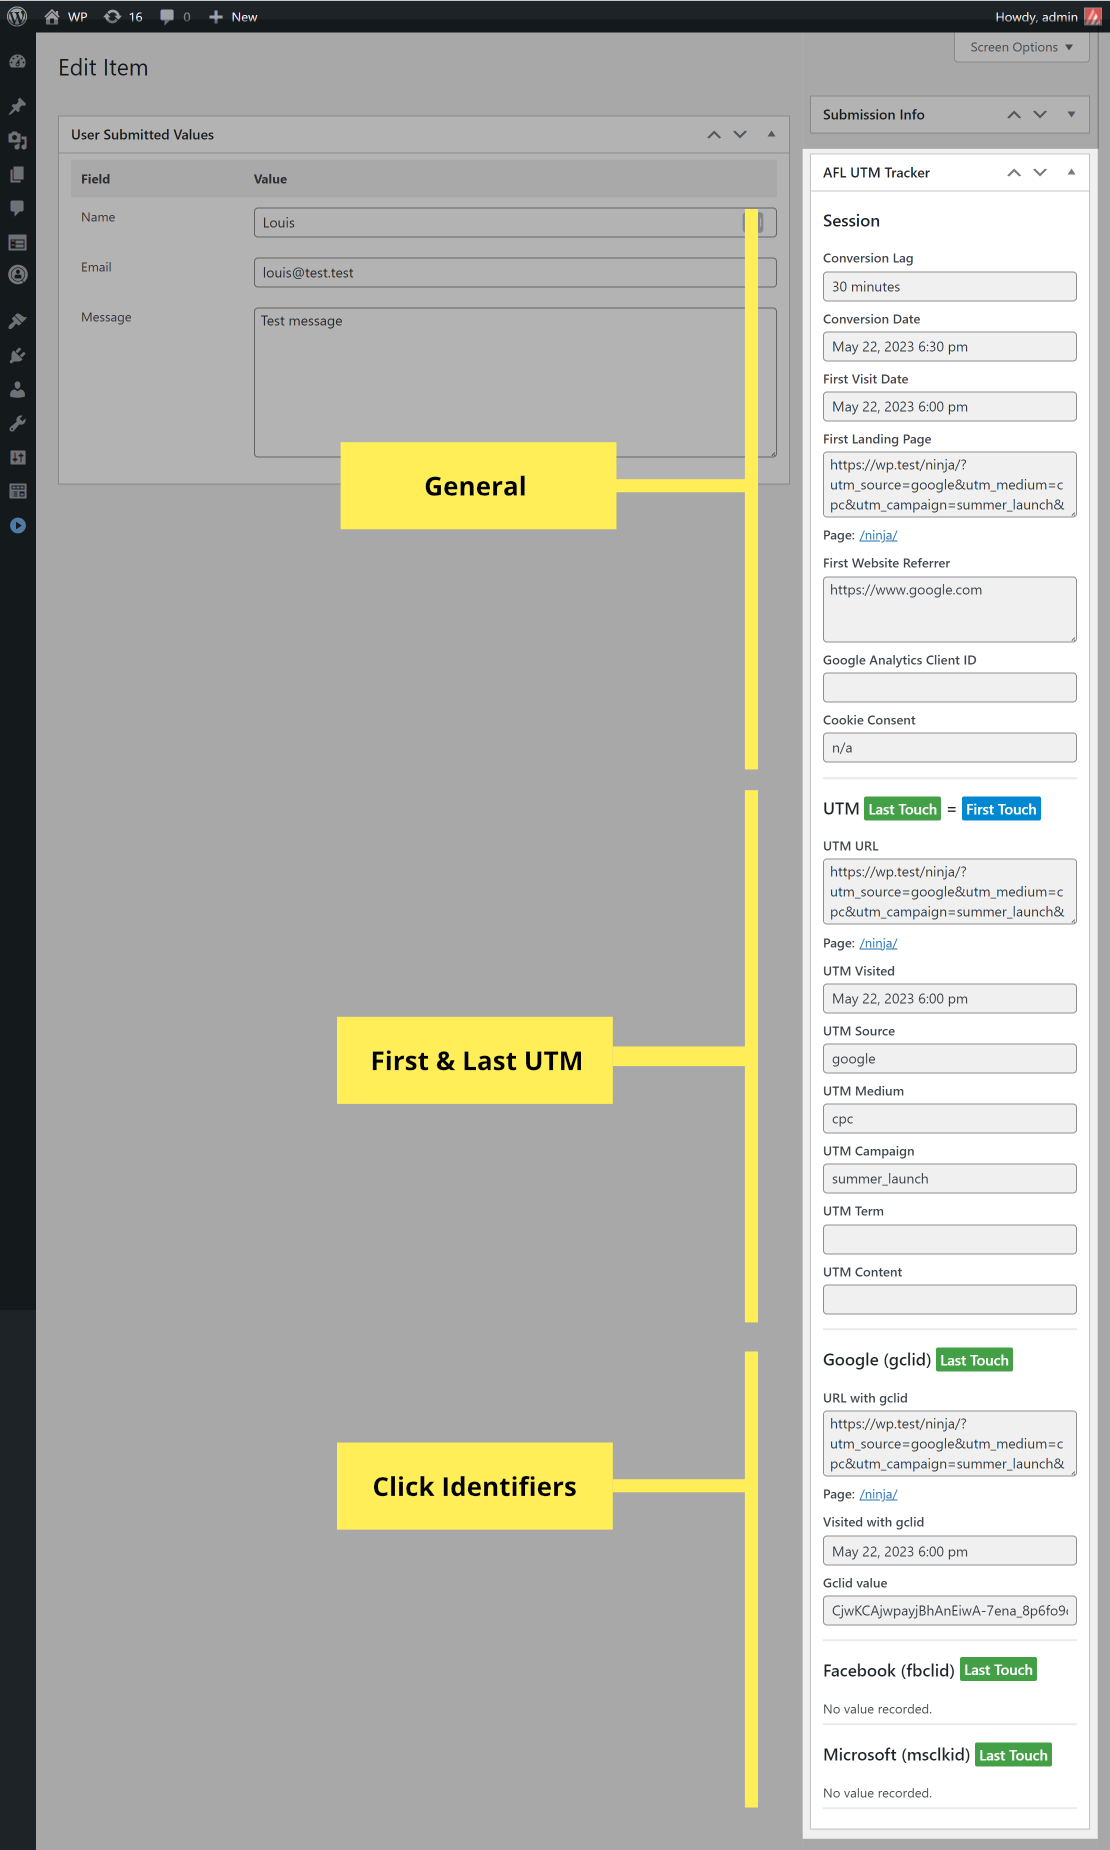
You can easily capture UTM parameters of your Ninja Forms submissions using our AFL UTM Tracker plugin. You can also instantly view the conversion attribution report in the WordPress admin.
This article outlines the steps for you to verify that your next form submission comes attached with our Conversion Attribution Report.
Minimum Required Plugins
- AFL UTM Tracker v2.10.0
- Ninja Forms v3.6.23
Steps
Once you have activated our plugin, UTM conversion tracking is enabled for all of your Ninja Forms.
- Please make sure that you have cleared all page cache so that our JavaScript tracking file is loaded.
- To set the default setting for all forms (optional), go to the Ninja Forms > Settings > AFL UTM Tracker section.
- To change a setting a particular form (optional):
- Under Ninja Forms > Forms > Select a Form.
- Click on the “Email & Actions” tab.
- Add our AFL UTM Tracker action.
In Ninja Forms version 3, the company has revamped the user interface (UI) for the Submission page. Because of that, third-party developers cannot build wider integration for now as the UI is currently limited.
To have a beautiful conversion attribution report you see below:
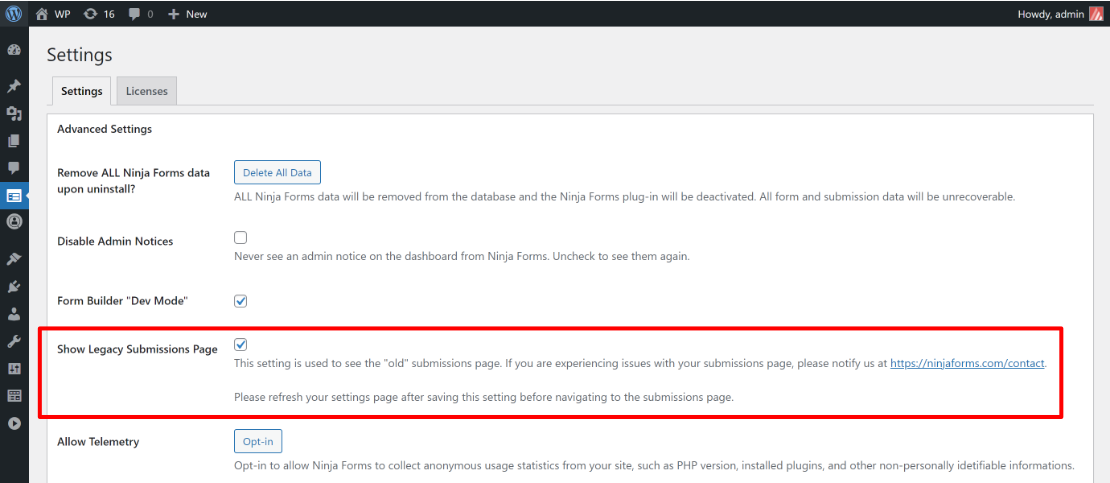
- Go to the Ninja Forms > Settings > Advanced Settings section.
- Check the “Show Legacy Submission Page”.
- Save Settings.
Saving the Conversion Attribution Report
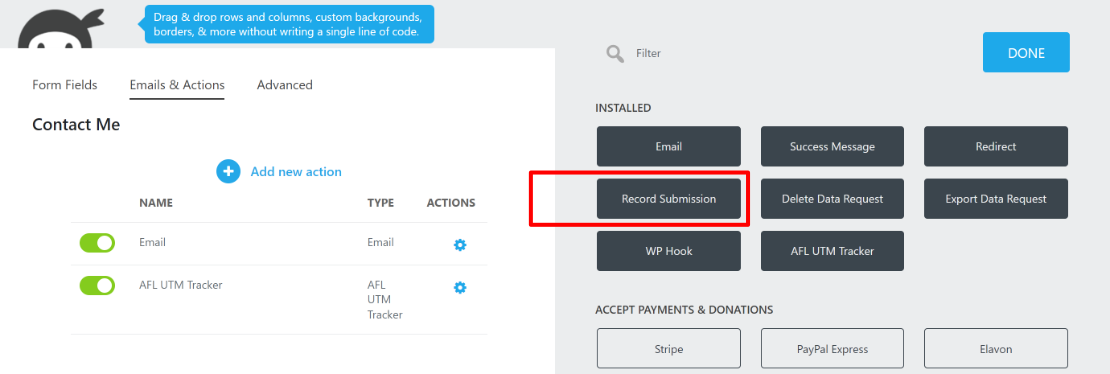
For our conversion attribution report to be viewable in the Ninja Forms submission page, make sure that you have the Ninja Forms “Records Submission” action added to each form.
- Go to the Ninja Forms > Forms > Select a Form.
- Click on the “Emails & Actions” tab.
- Add the “Record Submission” action.
- Click Publish.
Embedding the Conversion Attribution Report into E-mail Notification
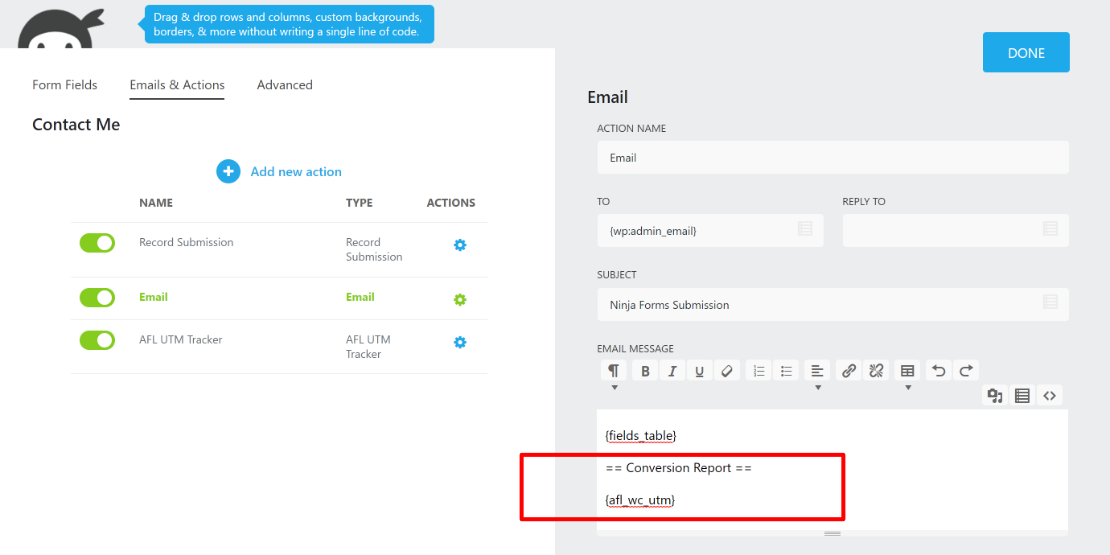
You can embed our conversion attribution report into your Ninja Forms e-mail notifications.
Important: Make sure that you are only adding the report to internal e-mail notifications and not to your visitors.
- Go to the Ninja Forms > Forms > Select a Form.
- Click on the “Emails & Actions” tab.
- Add or edit an existing “Email” action.
- In the e-mail body, add our merge tag {afl_wc_utm}
- Click Done and Publish.
How to test your form?
- Use the Google’s Campaign URL Builder to generate a campaign URL to a page where your form was embedded.
- Open your campaign URL in the Incognito/Private Browser mode to simulate a new website visitor.
- Fill and submit the Ninja Forms on your website.
- Check the Conversion Attribution Report in your Ninja Forms admin.
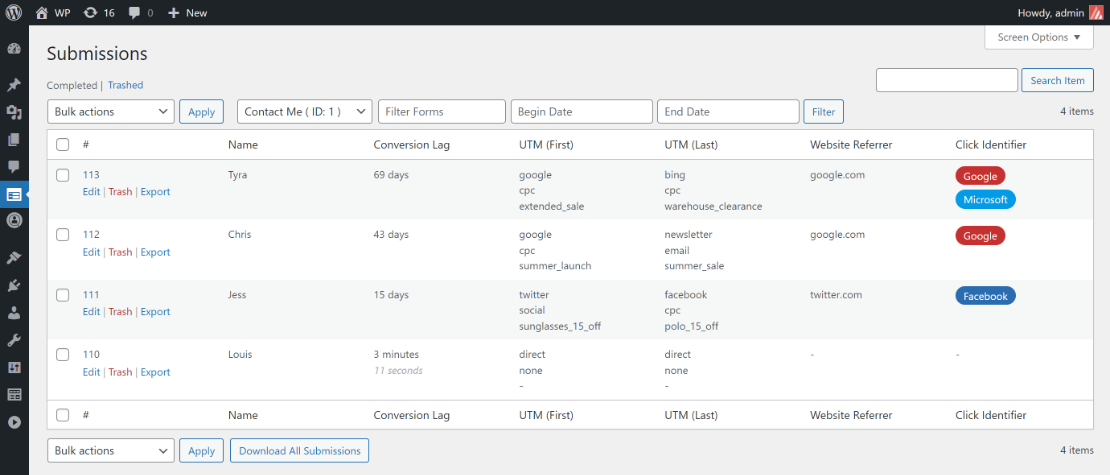
Viewing the Conversion Attribution Summary
- Go to the Ninja Forms > Submissions page.
- Here you will get a quick summary of each individual entry.
Viewing the Conversion Attribution Report
- Go to the Ninja Forms > Submissions page.
- Click into an individual Ninja Forms submission.
- Here you will be able to view the full conversion attribution report.
