You can use our AFL UTM Tracker plugin to pass the dynamic UTM parameters to your Calendly Embed Widgets placed on your WordPress website.
Minimum Requirements
- AFL UTM Tracker v 2.23.0
- WordPress 5.0.0 or higher
- Calendly
Types of Calendly Embed Widgets
There are several method of embedding the Calendly Scheduling interface into your WordPress website. Pick a method according to your site’s preference.
Make a test Calendly Appointment
After you have implemented our solution, make sure that you test out your Calendly appointments.
- Start by generating a UTM URL with Google’s Campaign URL Builder.
- Open the UTM URL in a private-browser mode (Incognito mode) as to simulate a new visitor.
- On the website page where you have embedded the Calendly Widget, start selecting an Appointment slot.
- Submit the Calendly form.
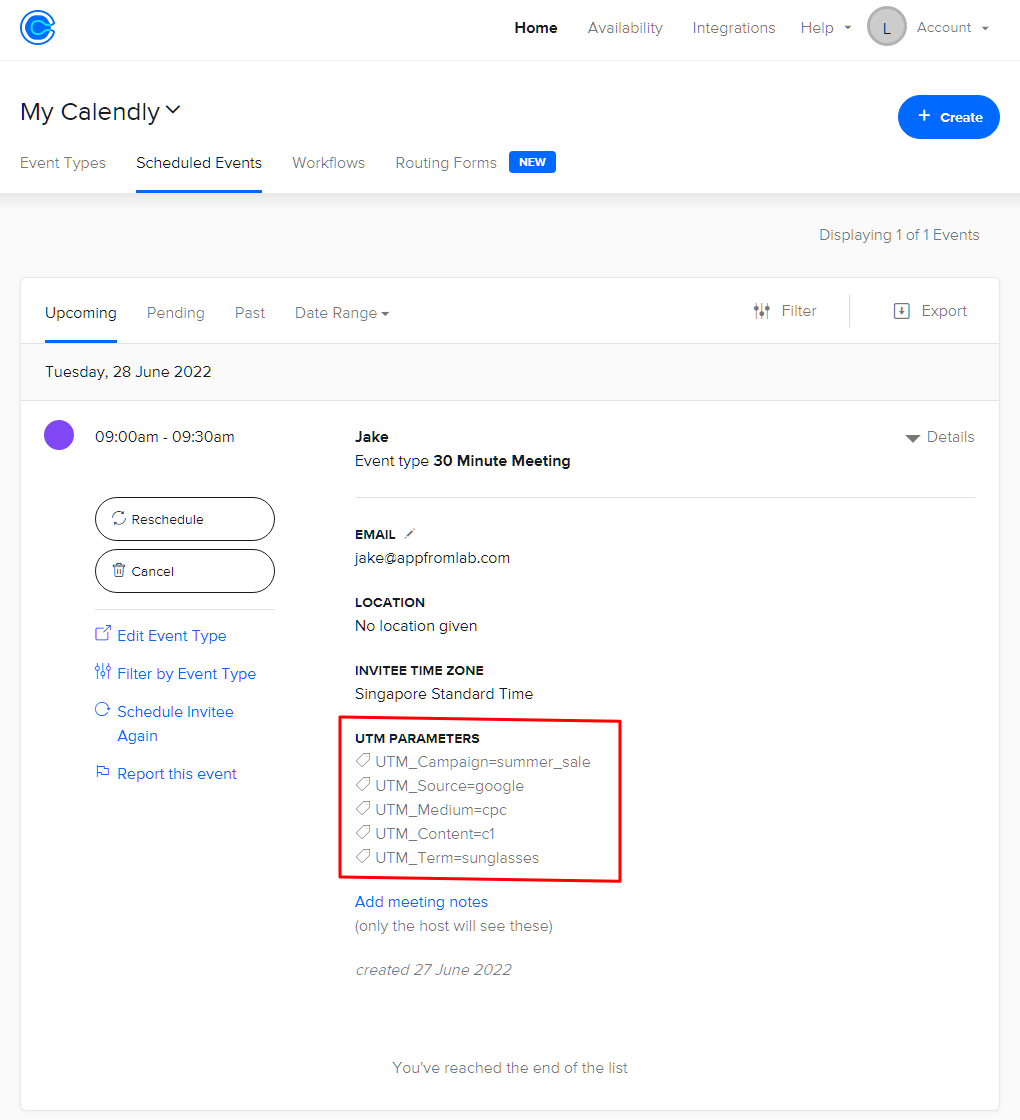
- Sign-in to your Calendly.com > under Scheduled Events > Upcoming Events > click on the entry which you have submitted.
- Under the UTM PARAMETERS section, you will see the respective UTMs (utm_source, utm_medium, utm_campaign, utm_content, utm_term).