In this Fluent CRM tutorial, we will show you how to send the utm_source, utm_medium and utm_campaign value from your Fluent Form submission to Fluent CRM Contact using our AFL UTM Tracker plugin.
Here is a list of WordPress plugins you are required to install:
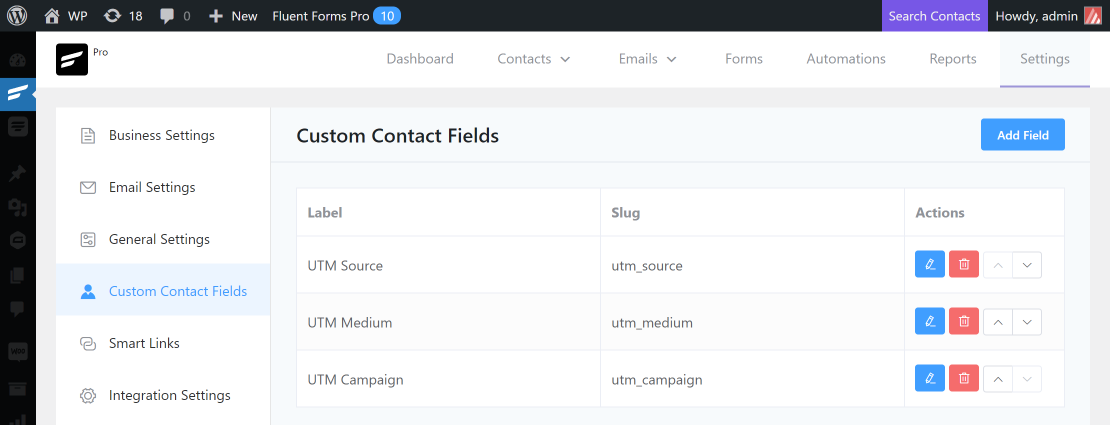
Create Custom Contact Fields in Fluent CRM
To begin, create 3 custom fields (UTM Source, UTM Medium and UTM Campaign).
- Go to the Fluent CRM > Settings page.
- Click on the “Custom Contact Fields”.
- Click on the “Add Field” button.
- Field Type: Single Line Text
- Label: UTM Source
- Slug: utm_source
- Click on the “Add” button.
Repeat step 3 for the UTM Medium and UTM Campaign field.
Add the “AFL UTM Tracker Integration” to Fluent Form
The purpose of our plugin integration is to help you automatically track your visitor’s UTM parameters and save them into the browser cookies.
Even when your visitors submit your Fluent Form two weeks later, our plugin will read the UTM parameters from the browser cookies and saves them into the Fluent Form submission to create a Conversion Attribution Report.
- Go to the Fluent Forms > All Forms page.
- Select a Form > Settings.
- Click on the “Marketing & CRM Integrations” tab.
- Click on the “Add New Integration” button.
- Select the “AFL UTM Tracker Integration”.
- Save Feed.
Read our full documentation for Fluent Forms.
Check out our AFL UTM Tracker plugin.
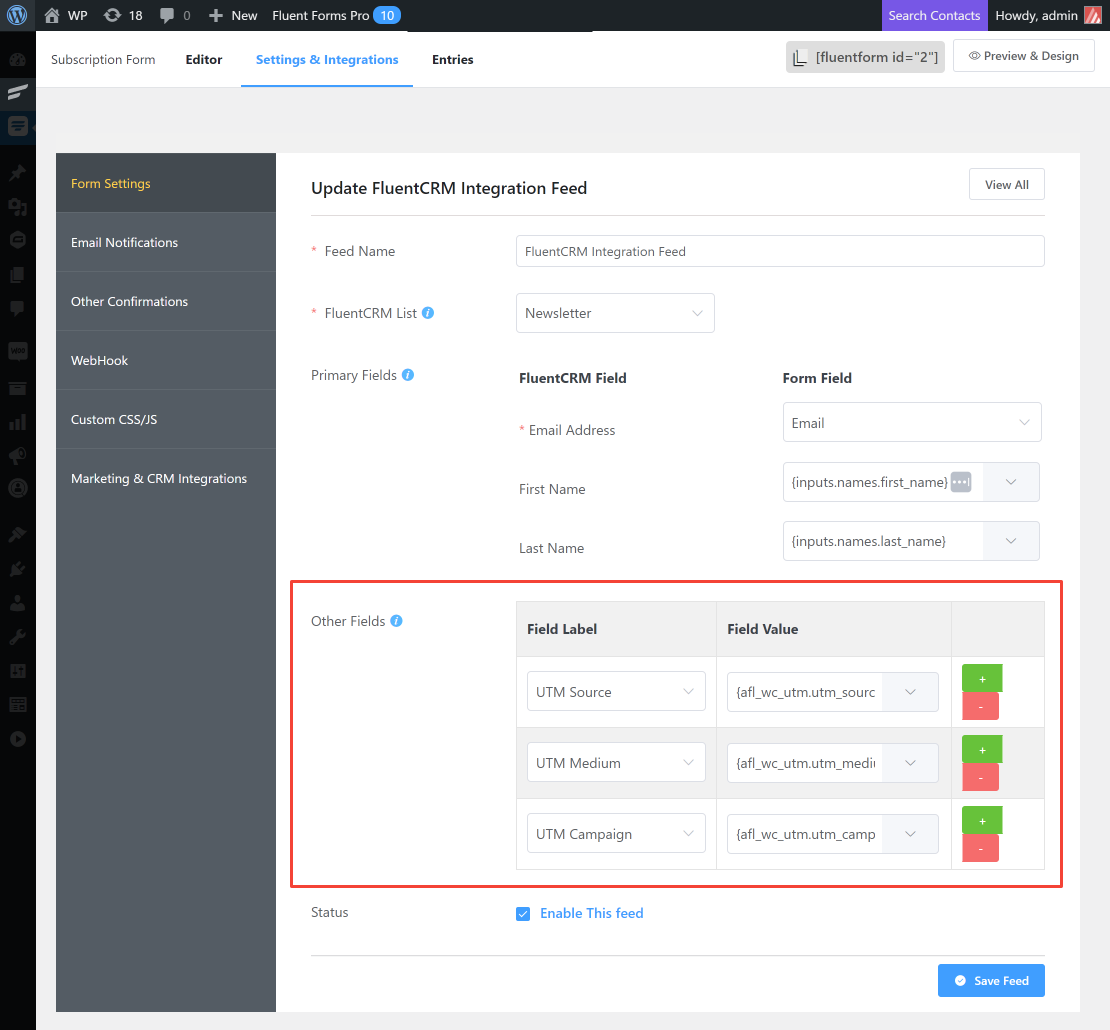
Add the “Fluent CRM Integration” to Fluent Form
The purpose of this integration is to automatically create a Contact in Fluent CRM after your visitor submits a form.
In this Feed Setting, you will be mapping the relevant form fields and UTM parameters to the Contact fields.
- Click on the “Add New Integration” button again.
- Select the “Fluent CRM Integration”.
- In the next page, select your Fluent CRM List.
- Under the Primary Fields section, map the appropriate Fluent CRM Fields to the Fluent Form fields.
- Under the Other Fields section:
- Field Label: Select “UTM Source” from the drop-down.
- Field Value: Select “AFL UTM – Last UTM Source” from the drop-down.
- Repeat for “UTM Medium” and “UTM Campaign”.
- Save Feed.
Testing Fluent Form Submission
- Use Google’s Campaign URL Builder to generate a UTM URL.
- E.g https://www.example.com/landing/?utm_source=newsletter&utm_medium=email&utm_campaign=2023_campaign
- To simulate a new visitor, launch your internet browser in private mode (Incognito).
- Paste the UTM URL in the address bar.
- Navigate to the website page having your Fluent Form.
- Submit the form.
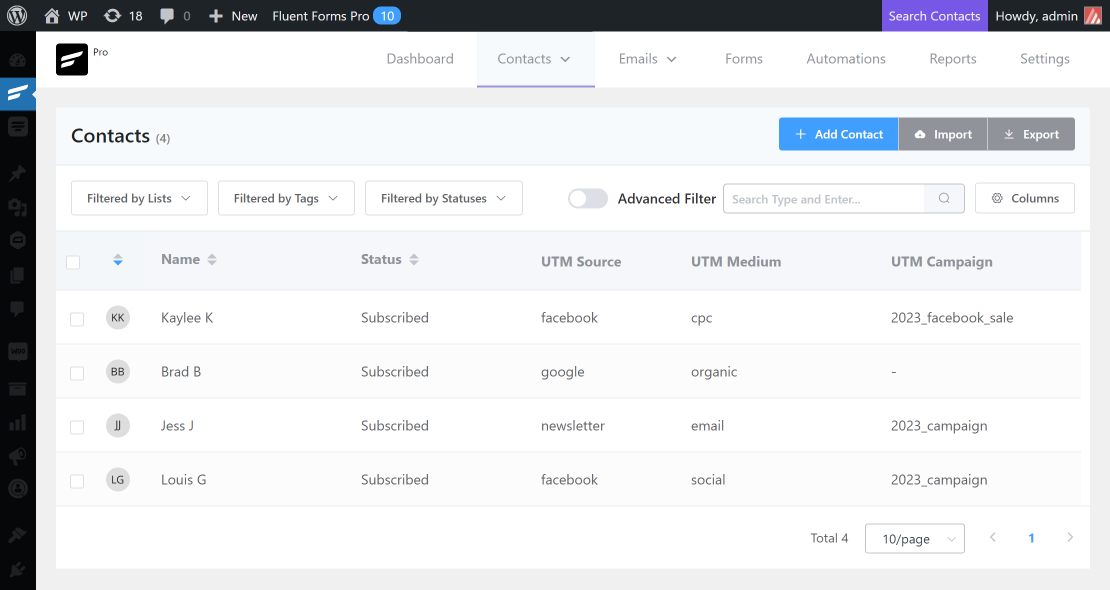
Viewing the UTM parameters in Fluent CRM Contacts
- In your normal browser mode, login to your WordPress Admin.
- Navigate to Fluent CRM > Contacts page.
- Click on the “Columns” button to add the 3 UTM columns.
- UTM Source
- UTM Medium
- UTM Campaign
You will see that the UTM parameters are populated in the columns.