In this Fluent Forms tutorial, we will show you how to save the Google Click Identifier (GCLID) value into the Fluent Forms submission without using any hidden fields or custom PHP code.
So our company have built the AFL UTM Tracker WordPress plugin to store the visitor’s first landing page, first & last touch UTM parameters and GCLID value into the browser cookies.
When a visitor submits your contact form or lead generation form, our plugin will read the GCLID value from the browser cookies to create the GCLID conversion attribution report.
But why are digital marketers interested in the GCLID value?
There are 2 reasons why a digital marketer would want to capture the GCLID value when a visitor submits the contact form on the website:
- Lead generation forms are not confirmed sales. Once the sales is confirmed by the sales team, the digital marketers will use the GCLID value to import the offline conversions into Google Ads.
- GCLID value can be use as an attribution signal that the visitor had clicked on your Google Ads.
Why are digital marketers using our AFL UTM Tracker plugin to capture the GCLID value?
- We save digital marketers from hundreds of hours of setup time.
- There’s no need to create any hidden fields in Fluent Forms. Imagine having hundreds of forms.
- Our plugin captures the full landing page URL of the Google Ad click.
- Our plugin captures when the Google Ad was clicked.
- Our plugin captures First & Last Touch UTM parameters.
- The GCLID value is not lost even after the visitor navigates to a different page since we use cookies.
Installing our AFL UTM Tracker WordPress Plugin
- Download our AFL UTM Tracker plugin from our plugin store.
- Install and activate our plugin on your WordPress website.
- Clear all page cache so that our JavaScript tracking file will load on your website pages.
- Enable our AFL UTM Tracker module in every Fluent Forms.
- Simulate a click on your Ad from the Google Search.
- Submit the contact form on your website.
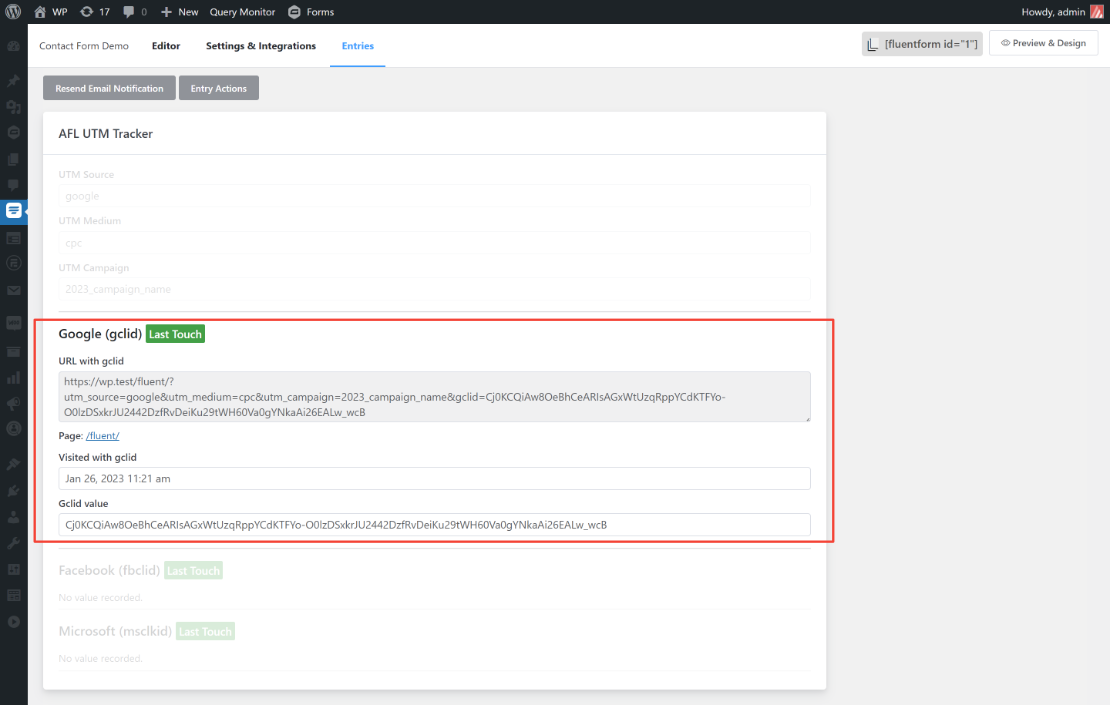
Viewing the GCLID Conversion Report
- Login to your WordPress Admin.
- Browse to the Fluent Forms > Forms page.
- Select the Form which you have tested.
- Go to the Entries page.
- Click into the Entry which you have submitted.
- Under our AFL UTM Tracker metabox, look for the Google (gclid) section.
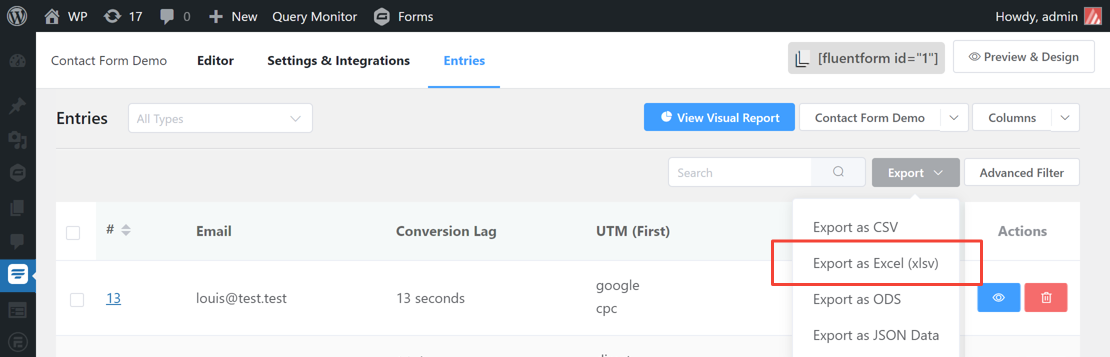
Exporting the GCLID value into Excel
Here’s how you to can export the GCLID value into the Excel file:
- Browse to the Fluent Forms menu > Forms.
- Select a Form.
- View the Entries tab.
- Click on the Export dropdown button.
- “Export as Excel” or “Export as CSV”.