In this Contact Form 7 tutorial, you will learn how to add your own custom table columns into the Flamingo Inbound Messages table using two WordPress hooks.
There are 4 default columns in the Inbound Messages table (Subject, From, Channel and Date).
The Flamingo plugin helps to store the Contact Form 7 submissions into the WordPress database. You will be able to view all the form submissions in the Flamingo > Inbound Messages page.
Add a “Company” and “Category” column
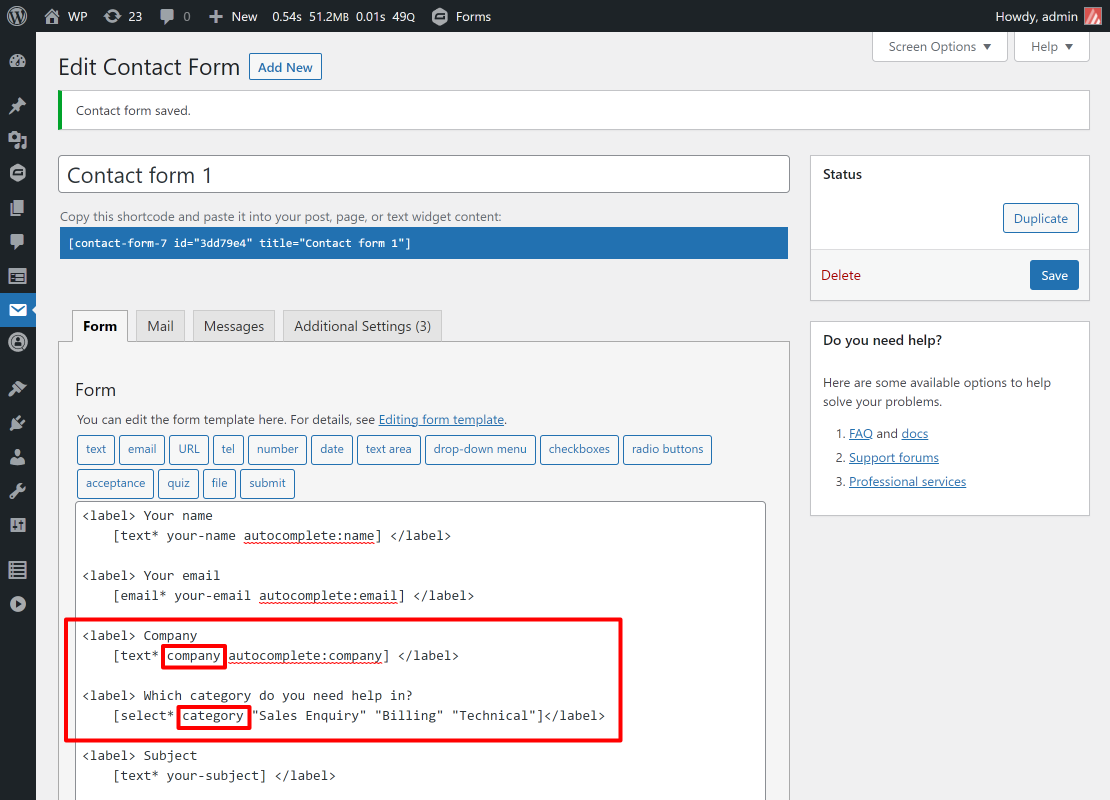
Let’s assume that your contact form has a text field to collect the visitor’s company name and a dropdown menu of a list of categories as shown in the screenshot below.
Now you want to display both the “Company” and “Category” columns in the Flamingo Inbound Messages table.
- Login to your WordPress Admin.
- Browse to Contact > Contact Forms.
- Edit your Form.
- Note the “company” field name highlighted in red.
- Note the “category” field name highlighted in red.
- Copy and paste PHP code below into your theme’s functions.php file.
PHP Code
The following code fits this tutorial scenario. If you want to change the columns to match the fields from your forms, then you need to edit the PHP code. You do need basic understanding of PHP.
In Line 9 and 10, change the “company” and “category” array keys and labels to suit your form fields names.
In Line 22 to 29, change the switch case statement to suit your form field names
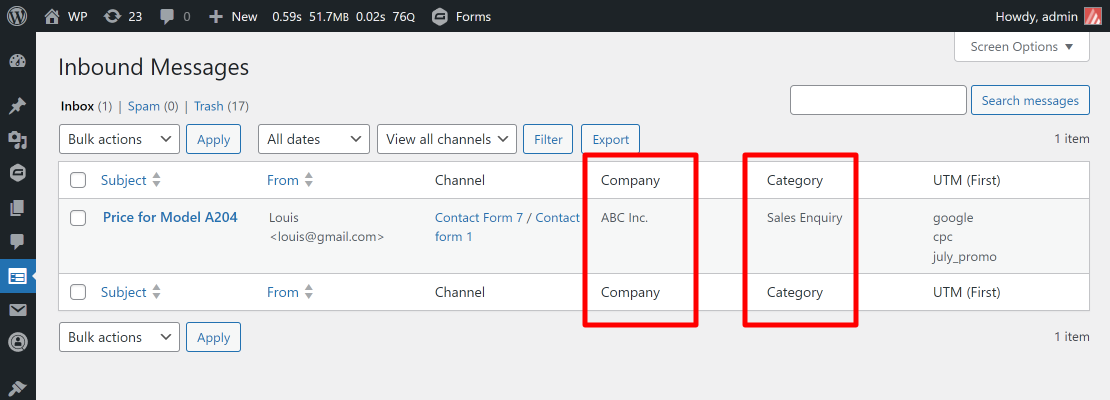
Results
Here is a screenshot of two custom columns added into the Flamingo’s Inbound Messages table.
Can you help your digital marketing team?
As a web developer, you can help your marketing team to understand where the form submission coming from.
By capturing the UTM parameters and showing them in the Flamingo columns, digital marketing teams can easily know which marketing campaign brought in that lead. Check out our article here.